When we went to IKEA in February, we bought a dining room table and eight chairs. After a combined total of two husbands, seventeen years of marriage and numerous dining rooms which held nothing but echoes, I was so damn happy to finally have a dining room set that I didn’t care the one we just bought came with white seat cushions.
That lasted until we got it home and assembled it, whereupon I banned all red sauce from our house because WHO’S THE NUMNUTS THAT INVENTED WHITE SEAT CUSHIONS? HAVE THEY NOT SEEN ME EAT SPAGHETTI?
I ran out to Jo-Anns when they were having a big sale and spent hours picking out the perfect fabric. After waiting in the cutting line for twenty minutes, I heaved my chosen bolt of fabric on top of the counter, earning a fourth herniated disc in the process, only to be informed (1) the fabric was not included in their sale; (2) it sold for $38 a yard; (3) I would need at least three yards of it; and (4) no, they had no idea that the universe hated me.
I wound up using a 50% coupon and paid $19 a yard so it wasn’t as excruciating as, say, getting a bikini wax without adhering to the whole trim as a prelim thing because that little tidbit of advice never came up on a Google search of “what to expect when you have a complete stranger pour hot wax on your nether regions and rip the hair off your hoo-ha.”
Now, for the chairs, you’re going to need a staple gun, scissors and the ability to make up new and unique curse words on the fly.
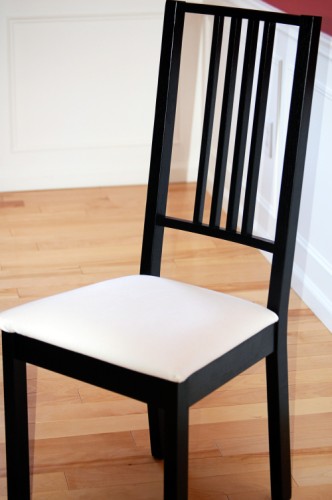
This is what I started out with. I normally adore a black and white combo but again, I ask you … who in their right mind wants a white seat cushion on a dining room chair? For that matter, who in their left mind wants one?
For those of use who have completely lost our minds, don’t feel obligated to answer.
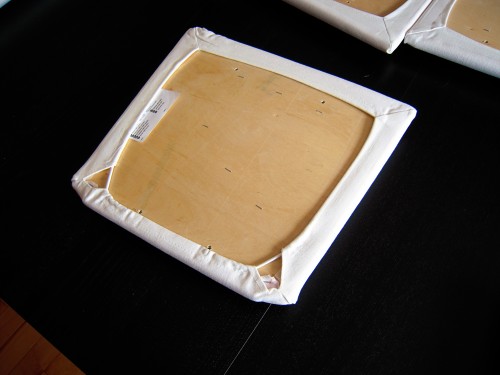
When I took the seat cushion off the chair, this is what it looked like. And when I say “I” I totally mean Nate who was absolutely thrilled to disassemble the same furniture he had just spent four hours assembling.
He loves me to death. He forgets that sometimes and I have to remind him but that’s OK. That’s what wives are for, right?
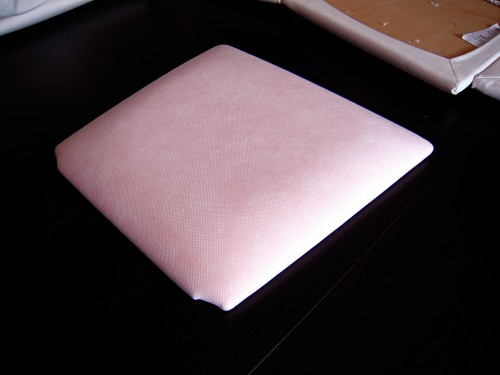
The white cover turned out to be a slip-cover which was easily removed (and revealed pink padding underneath) and I took this to mean that IKEA knows perfectly well no one wants to eat spaghetti bolognese on a white seat cushion without having the option to throw the cushion in the washing machine or the garbage, depending on the spray pattern and whether your mouth happened to be shoved full when you sneezed twelve times in a row.
All of the tutorials I read said to cut the fabric at least 2-3 inches wider than the seat cushion. I am all about overkill and Murphy’s Law so I cut mine 4-5 inches wider. But you don’t have to be as anal retentive as I am! Go wild and stick with 2-3 inches! Live on the edge! Be a risk taker!
I’m allergic to risks so I’ll just sit here and twitch and rub Benadryl all over my body.
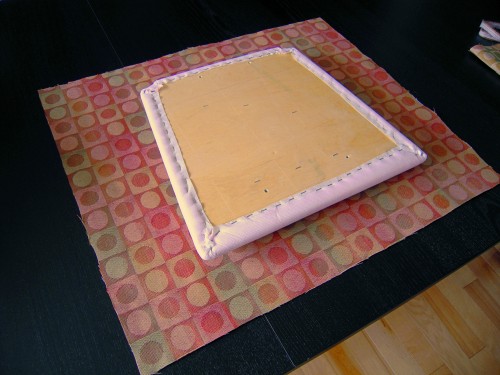
Whatever you decide to do, after you do it, put the cut fabric right side down on your surface. Then place the cushion upside down, centered on top of the fabric.
Now this is where it starts to get interesting, just in case you’re dozing off over there because you’re bored to death.
*tap tap*
WAKEY WAKEY!
Pull the fabric tight over one side of the cushion and staple it once in the middle of that side. BAM.
Then place two staples immediately to the left and to the right of that first staple, pulling the fabric tightly each time. BAM BAM. BAM BAM.
Once you do this on one side, repeat the process on the opposite side, making sure to pull the fabric tight before each staple to prevent buckling. Then keep alternating between the two opposing sides, pulling and stapling until you get about 1½ – 2 inches from the corners. Repeat with the other opposing sides.
BAM to the tenth power.
Staple once in the middle, staple twice to the right, staple twice to the left and jump to the other side. Swing your partner round and round and dosey-do! Two hands up and around you go! HEE HAW!
Sorry.
Some tutorials suggested this process was easier with two people. I found that adding another person into the mix while using a staple gun was cumbersome and simply doubled the amount of fingers that could be used as target practice. Besides, it didn’t take long before Zoe realized how much it would suck to text without her left thumb and bailed on me.
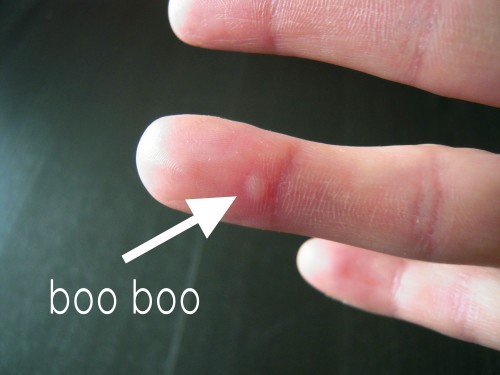
My first of many owies.
Yes, my skin is dry. No, I was not descended from elephants.
Did you just call my mom an elephant?
I’m telling.
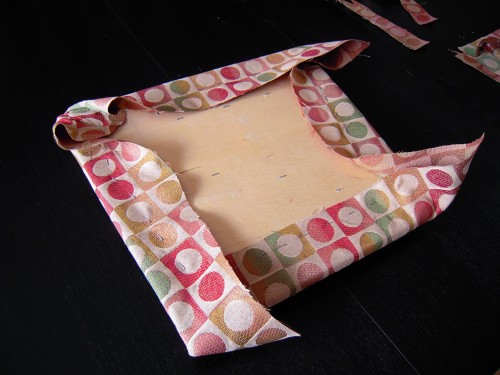
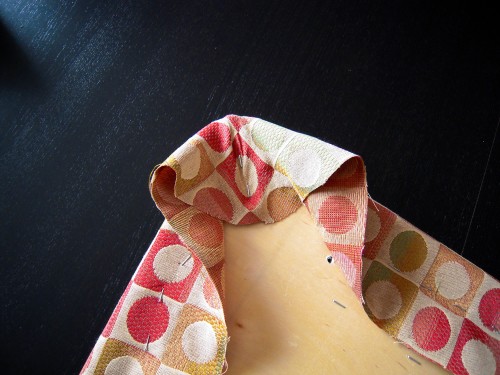
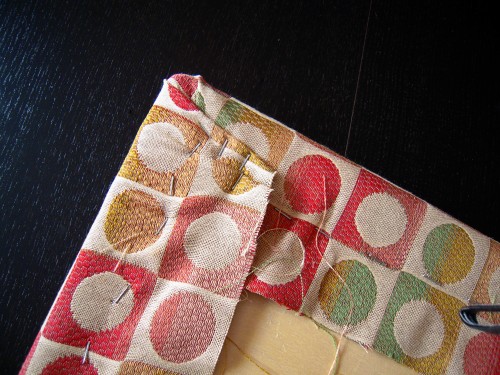
The dreaded corners. Although, honestly? I actually liked doing them best of all and ultimately found them to be the easiest part! Then again, I’m also compelled to run over a pothole with my left tire if I just ran one over with my right because I think they cancel each other out and won’t affect my car’s suspension so, there you go.
You’ll probably have to trim your material a bit, just so you don’t have so much excess fabric to staple down. Then, just tightly pull the corner of the fabric down and give it a good stapling. I only needed two staples here but I had others where I used a good four or five. It all depends on how much fabric you’re working with and how you choose to vent your anger after your husband decides to help out by offering “constructive” criticism from the living room sofa.
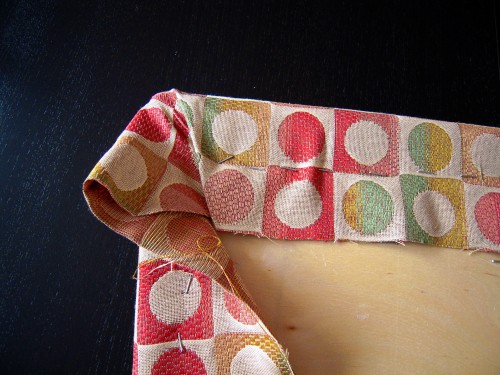
Then, fold down one side of the corner. You might have to fiddle with the material, tucking it in a bit here or there so as to achieve a smooth fold with no buckling. Staple staple staple.
Then fold the other corner, fiddling with the material as you need. Staple staple staple.
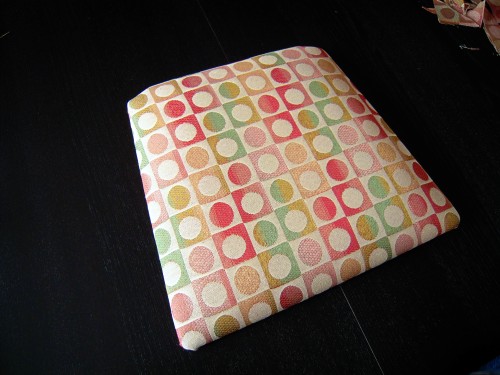
Do this for all four corners, or however many corners you have. Although personally, I would not suggest purchasing octagonal chairs EVER. Unless you like having blisters for hands.
This is what it will look like when it’s all done.
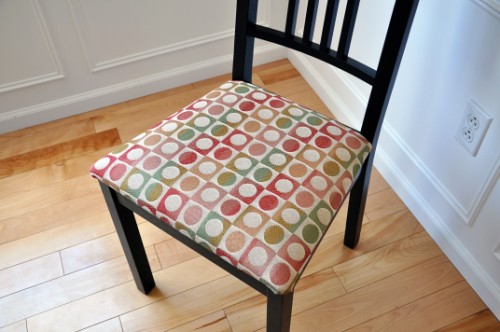
And this is what it will look like after you yell to your husband YOU KNOW, IF YOU REALLY WANT TO BE HELPFUL, STOP TALKING AND START SCREWING. But only after you explain to him in no uncertain terms that by screwing, you mean with the drill in the garage, not the one hanging below his belt buckle.
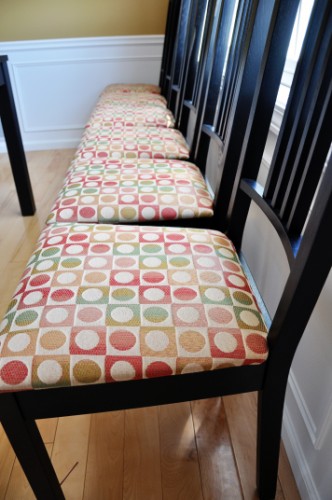
Not including the time it took for my blisters to heal, it took me about two whole days total to do eight chairs.
After tackling this project, I am no longer afraid of a staple gun.
Today, seat cushions.
Tomorrow, tummy tucks!
.
.



43 thoughts on “Sitting pretty”
*lol* Not MY tummy, thank you!! Great job on the cushions, Andy!
.-= Heather T.’s last blog post is here ..Two Dollar Tuesday =-.
Fabulous work. Love the fabric you chose and it all looks very professional.
.-= Davinia’s last blog post is here ..The Muse, MacGyver and Me =-.
This was awesome to behold. Love the fabric and anal-retentive is my middle name. Personally I love a good glue gun but you’ve made that staple gun sound so attractive I may switch weapons of choice.
.-= Cheryl’s last blog post is here ..Smiles That Make Me Smile =-.
Love that fabric!
.-= stacey@Havoc&Mayhem’s last blog post is here ..10,000th photo =-.
Nice job on reupholstering you chairs. Years ago, when I had fabric-cushioned dining room chairs, I would look forward to changing them every couple of years. Love the fabric you chose!
So, seeing as how you’re all Martha Stewart with a staple gun and fabric, wanna come over and help me recover the cushions for my brand-spanking-newly-acquired, vintage (as in it was my grandmother’s, from the Sixties) rattan porch furniture set? Because the pattern on those cushions makes my eyes bleed, and I cannot even wrap a perfectly square or rectangular present for a child’s birthday party. (Okay, so if it is for a child’s party, I tell myself the other kid’s parents will doubtless assume that *my* kid wrapped it, not me. Heh.) I am the reason for which gift bags were invented, though that’s neither here nor there. What I’m saying is, I can’t do corners, and I have a buttload of heinous, 60s floral (I’m talking turquoise! and gold!) cushions to redo…… So, once those blisters heal, wanna come over? 😀
.-= Heather @ nobody-but-yourself’s last blog post is here ..Spring FAIL =-.
That looks awesome!!!! And the only dining room with white cushions are for those that never use the table except for holidays… white? Seriously?!… love the pattern you picked!
And if the line “shut up & just screw” doesnt draw a husbands attention – then you need to check for a pulse!
.-= Rebecca Jo’s last blog post is here ..dancing is not helping with the headache tonight…. =-.
wow. I have dr chairs that I’ve wanted to recover for 14 YEARS! MAybe I’ll do it now. Because that staple gun technique? Is sexxxyyy.
*sigh* I’m starting to think we may be long lost cousins or something. I have those exact chairs from IKEA, only I decided to “give them a try” to see how the white would hold up… I now have chairs with faint echos of stains that will not come out….
I should have trusted my instincts and recovered them…..
I guess its never to late right?
Those chairs look great-I love the fabric. Congrats on enjoying the staple gun-it ranks second only to the crowbar for me. And, I’ve only stapled my finger once!
These turned out beautifully.
Sorry about your booboo.
.-= Tracy’s last blog post is here ..A layout =-.
beautiful work, you did a fab job! fabric is gorgeou, sorry about your booboo, hugs mandyxx
The cushions on my glider are in serious need of reupholstering. Sadly, it won’t be as easy as dining room chairs and a staple gun. I think I will let the professionals do it…if I can find one I can afford!
.-= Mary Ann’s last blog post is here ..Visiting Author =-.
Step away from the staple gun – do not, I repeat, do not, use a staple gun on your tummy.
Your chairs look wonderful. I love the fabric you picked. I need to go get new fabric for my chairs. I hope I can find some that is on sale – that I like.
.-= sunshine’s last blog post is here ..Lancer =-.
They look amazing!!! You should totes start your own seat covering business and drop some business cards at IKEA because you’re absolutely right, who in their right minds would want to sit on white dining room chair cushions? Probably the same weirdos who would buy white couches.
FABULOUS JOB! They look like perfection!
.-= Rachel Hawkins’s last blog post is here ..Crafty Baby Shower =-.
ROFL!!! Great seat cushions. Your description of a bikini wax reminded me of the dumbass post I had on an old blog about my own experience with a bikini wax, where there was NO trim involved prior to…and yes, it was NASTY. Oh the painful memories.
.-= Marlene’s last blog post is here ..Mrs. Prickles and company =-.
The chairs look great! I did this project once, with an old friend. It wasn’t a fun one. We stuffed batting under our material too. It was so unfun that my dining room chair seats are currently as flat as a pancake and crying to be replaced but I’m avoiding it. Maybe if you lived closer you could supervise?
.-= valmg @ Mom Knows It All’s last blog post is here ..Affirmation And Answers Through CJ And Noddy =-.
That is amazing! WOW! I wish I had talent (or complete senility, lol) like you to do something like this!
Great job on the cushions – I like the fabric you chose – and your writing is hilarious. I’ll be linking in my blog roundup on Thursday if that’s OK?
.-= Abigail’s last blog post is here ..Magic loop knitting – cabled shrug =-.
I’m so proud of you!!!! Great Job! You have so many talents you didn’t know you had!
I love the new look. Please come over and decorate my house! lol
Love the fabric with the black chairs. Wonderful photos too. I need you to decorate my house.
Mary
.-= Mary ‘s last blog post is here ..Okay, I’m An Strumpet! =-.
Hey, if you’re not doing anything tomorrow, can you re-cover my sofa?
.-= SeriousMom’s last blog post is here ..Family Night =-.
Wow, it looks amazing! You’re gonna kill me but I was actually thinking, “That’s ALL you ahve to do to recover seats?” I’m sure it’s one of those things which is harder than it actually looks though. The new fabric is brilliant!! Love the colors!
.-= Helene’s last blog post is here ..The daughter grows up and teachers her father a few life lessons… =-.
This brings back fond(ish) memories of my Mum following her upholstery evening classes with her trusty heavy duty stapler. Our piano stool still bears the scars!
Her motto – if it moves – staple it…..and then some!
Chairs look amazing – congrats on managing to complete all 8 with the pattern staying aligned on every one of them.
.-= Janmary, N Ireland’s last blog post is here ..New Lessons and new jewelery by janmary designs with FREE shipping =-.
Ya know, staples are an amazing thing. You know that you only need staples holding your c-section incision together for three days after surgery? At which time, they send in a student nurse w/ tattoos and piercings, to remove those staples, who says to you, “I actually have never done this before!”
Hmmmm I feel a great blog post coming on, and another bout with PTSD.
.-= Insanitykim’s last blog post is here ..I’m Not Me if I Don’t Talk about SPIDERS! =-.
OOoo – just think how easy it will be to change them next week when you’re stressing over how they look!
Just kidding Andy…
You, stress about something? Nah…
Stan at Scrappers Workshop
http://www.scrappersworkshop.com
.-= Stan’s last blog post is here ..Quick Tip Tuesday – We want your Opinion =-.
You crack me up! The chairs look great. Love IKEA!
awesome job! And you’ve made me so very jealous. Our chairs are smeared with yogurt and toddler grossness. You’ve inspired me!
.-= Heather’s last blog post is here ..Whoa, what a mess! =-.
They look fantastic!!! ouch to the boo boo
I bought fabric TWO YEARS ago to recover my dining chairs.
We finished . . .one.
.-= Rachel’s last blog post is here ..Semi Wordless Wednesday: Don’t MAKE Me Say It Again =-.
My set also came with white cushions. I left them for a couple months, since it pained me to recover brand new chairs, but then I came across a fantastic remnant at my local fabric store, and got to it. I managed to squeeze coverage of all six chairs out of the peice & adore them now.
I’m impressed at how well you did with the pattern you chose, those squares would nor be very forgiving of any faux pas.
.-= Robin (the one sleeping in the corner)’s last blog post is here ..Wordless Wednesday: Going & Going & Going =-.
Pingback: Tweets that mention How to recover your dining chairs without committing suicide | thecreativejunkie.com -- Topsy.com
Andy, those covers came out *fabulous*!!!!
.-= Joy (Wingnut)’s last blog post is here ..A bright, sun-shiny day…and other random thoughts =-.
Preparing to redo my dining room chairs as they are getting a bit skanky.. Loved your version of how to do just this. Thanks!
Hi, my problem is that I do not have the seat, it is only the chair and a hole for a seat. Is there a place where Y can get a seat?
Outline the shape you want onto cardboard or paper. Take it to the hardware store. They can trace the lines an cut a suitable replacement board for you.
You’re chairs look awesome and I thoroughly enjoyed your post. You’re hilarious!
Hi Andy,
You make this look so simple, I am encouraged to do my four dining room chairs. They have a black seat and I wish to change it up a little since our two young boys have ruined the existing ones. I only have on question; my seat base is 18 x 18 x +-2. I have 4 chairs. How much fabric do I need? I know nothing about fabric measuring at all…..
Thanks.
I just want to say, your post cracked me up! The way ou write is the way my braiworks lol. Your chairs turned out amazing!
thank you! i have these exact chairs from ikea and tackling this project this weekend. my white seat covers are finger painted with black/blue cake frosting from my daughter’s 5th halloween/bday party. anyways, i googled recovering ikea chairs…your post was the first to come up and LOVE IT. thank you!
I love the fabric you used for the upholstery